August 9, 2019
by Matteo Bertozzo
Find more about
[development]
Talking about vim, a command-line based editor, during the era of visual studio code, that as of 2019 is [the most popular development environment], seems a bold move at least. But, actually, it is a very valuable tool: let’s see how to get started using it.
Vim has some interesting benefits:
- it is bundled in almost every UNIX based system, in other words macOS and any Linux distribution — this means you probably already have it on your machine (if not, you can install it in, literally, a minute);
- it is highly customizable;
- you can define your configuration file once and apply it to any system simply copying it;
- you can work with your hands never leaving the keyboard!
Getting started
Launching Vim is really simple, just head over your terminal and type the following command:
$ vim
That’s it, you’ll be welcomed by the following screen:

Easy, isn’t it?
Yep, it certainly is. But then we try to type something. And nothing happens.
Vim Modes
Perhaps the main difference between Vim and any other traditional code editor is the existence of modes. Modes basically are different behaviours of the editor, based on what you want to do.
The three main modes are:
- normal mode: allows you to run commands and it’s the default active mode when Vim starts up (and the reason why we weren’t able to type before!);
- insert mode: allows you to write and edit text;
- visual mode: allows you to select some text to perform a command on that part of the document.
Back to our terminal with Vim: we understood we are in normal mode, to switch to insert mode just press i and start typing. Now you can write!
What if you want to save your file?
You have to get back to normal mode by pressing the ESC button. Then, type :w, followed by the path where you want to save the file and the name. For example, if you want to save in the Documents folder you can type:
:w ~/Documents/text.txt
To quit the editor type :q, to save and quit :wq, to quit discarding changes q!.
Some more commands…
Vim obviously has many more commands you can use in normal mode, even though to start using it you just need to know what we’ve already seen. Here’s a really quick summary of the most useful commands, for a complete reference and an interactive tutorial you can [follow this link].
h(left),k(up),l(right),j(down): moving aroundw: go to the beginning of the next worde: go to the end of the word under the cursorb: go to the beginning of the word under the cursorf: find a character (for example,f ofinds the next o)%: find the closing brace0: go to the beginning of the current line$: go to the end of current line*: go to the next occurrence of the word under the cursor#: go to the previous occurrence of the word under the cursorgg: go to the beginning of the fileG: go to the end of the fileo: add a new line before the current line (uppercaseOadds it after)x: delete the character under the cursord: delete command, combined with other selectors (dddeletes entire line,dwdeletes the word to the right of the cursor,d2edeletes the next two words) — it also copies the deleted content, you can paste it withpu: undo
The next part of the article is going to show how to customize Vim and make it similar to a traditional code editor.
Customizing Vim
Everything you need to customize Vim is a .vimrc file in your home folder. To create it, open a console and type the following commands:
$ cd ~
$ touch .vimrc
$ vim .vimrc
Then press i to enter insert mode and start adding your preferences. The following can be a useful configuration if you use Vim to write code:
syntax enable                   " Enable syntax highlighting
set autoindent                  " Copy indent from current line on <CR>
set backspace=indent,eol,start  " Backspace behaviour
set cursorline                  " Highlight cursor line
set encoding=utf-8              " Set character encoding
set expandtab                   " Expand tabs to spaces
set hlsearch                    " Highlight all search results
set ignorecase                  " Ignore case when searching
set incsearch                   " Show matches when searching
set linebreak                   " Break lines at word
set number                      " Show line number
set shiftwidth=2                " Number of spaces to use for indent
set showbreak=+++               " Broken line prefix
set showmatch                   " Highlight matching braces
set smartcase                   " Enable smart-case search
set smartindent                 " Enable smart-indent
set smarttab                    " Enable smart-tab
set softtabstop=2               " Number of spaces per Tab
set ruler                       " Show line and column number
set textwidth=100               " Line wrap
set undolevels=1000             " Number of undo levels
set visualbell                  " Use visual bell (silence system bell)
For a more consistent experience, we now want to add language-specific highlighting packages. Here’s where plugins come to our rescue!
First thing to do is to install pathogen, a tool to easily manage plugins and runtime files. It’s super easy to install, just type in the console the following command, as described in the tool readme [click here to view the page]:
$ mkdir -p ~/.vim/autoload ~/.vim/bundle && \
  curl -LSso ~/.vim/autoload/pathogen.vim https://tpo.pe/pathogen.vim
Once you’re done, get back to your .vimrc file and add the following as the first lines:
execute pathogen#infect()
filetype plugin indent on       " Allow plugins to determine indentation
We’re now ready to add any plugin we want. As an example, we’re going to install the syntax highlighting plugin for JavaScript. To get it just type in the console the following command, as described on the [plugin homepage]:
$ git clone https://github.com/pangloss/vim-javascript.git ~/.vim/bundle/vim-javascript
Customize even further
Someone may complain for the fact that common editors have a built-in file explorer. Well, Vim has it too! And it doesn’t even require a plugin!
To view the file explorer in Vim just open it in normal mode and type :Explore (or :Vexplore to open it in a side panel).

Pretty different from what we’re used to see in traditional editors. Let’s add some configuration to the .vimrc file to make it more appealing and, why not, maybe have it as a “sidebar” always visible while we’re editing:
let g:netrw_banner = 0          " Hide the directory banner
let g:netrw_liststyle = 3       " Set the view type to tree
let g:netrw_browse_split = 4    " Open file in the previous window
let g:netrw_altv = 1            " Open netrw on the left split
let g:netrw_winsize = 25        " Set the width to 25% of the screen
augroup ProjectDrawer
  autocmd!
  autocmd VimEnter * :Vexplore  " Open netrw when Vim starts
augroup END
Save the edits and relaunch Vim. You should now see something like the following:
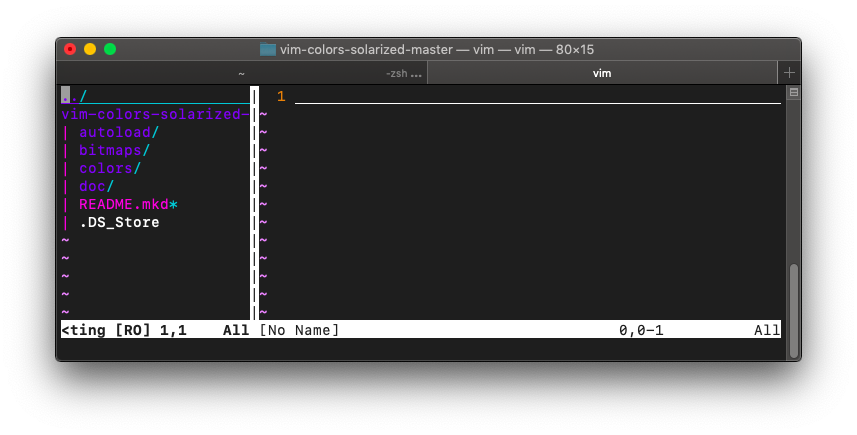
Much better!
To move back and forth between the two Vim splits, just press CTRL + w + w (or you can press w once and then the right or left arrow). To add a new split just type :sp for an horizontal split or :vsp for a vertical split. You can also add a space and a file name after the previous commands to directly open a file in a split. (:vsp filename.ext). To change the size of the currently active split you can use the following commands:
CTRL + w + 10 + >: increase (or reduce, based on the split position) the width of a vertical split by 10 columns to the right;CTRL + w + 10 + <: increase (or reduce, based on the split position) the width of a vertical split by 10 columns to the left.
Clearly we used 10 as an example, you can enter any number you want. If you’re working with horizontal splits, just replace the < and > symbols with - and +.
The very final touch is the customization of the theme. To get a list of all available themes you can type the command :colorscheme in normal mode, followed by a space and then press TAB: this will loop the names of all the available themes, that you can temporarily apply by pressing ENTER. Once you decide what theme to use, simply add the following line to the .vimrc file (changing the name with the one you want):
colorscheme desert " Use desert color scheme
Clearly you can add new color schemes, simply by copying the definitions file to the folder ~/.vim/colors/. At the moment I’m using the Oceanic Next theme, that you can download [from here].
Please note that unfortunately not every terminal emulator support True Color (that allows to display 16 millions colors), but are only capable of displaying 256 colors. Unless you change terminal emulator, many themes may thus fallback to a 256 color configuration.
And that’s all, we’re now ready to go with Vim!